MacOS Niri and Hyprland inspired tiling window manager that's developer signed and notorized (safe for managed enterprise environments). Aiming for parity and extra innovation.

Demo Video
Contributors
Thank you to everyone who contributed to OmniWM. Your ideas and code made a real difference.
🏢 By Employer

Bitkey ━━━━━━━━ 
Naoki Ikeguchi @siketyan |

BlueLabs ━━━━━━━━ 
Cristian Álvarez Belaustegui @crbelaus |

EPAM ━━━━━━━━ 
Aleksei Gurianov @Guria |

Finanzguru ━━━━━━━━ 
Janek Thomaschewski @jthomaschewski |

GitHub ━━━━━━━━ 
Ryan Hecht @RyanHecht |

━━━━━━━━ 
muhammadkh @MuhammadKh |

Luxor Labs ━━━━━━━━ 
Albert Ilagan @albertilagan |

Nx ━━━━━━━━ 
Steven Nance @llwt |

ReactSquad ━━━━━━━━ 
Jan Hesters @janhesters |

Spotify ━━━━━━━━ 
Alexander Dergachev @Cy6erBr4in |

SSW Consulting ━━━━━━━━ 
Matt Wicks @wicksipedia |
vhf ━━━━━━━━ 
Lukas Gerlinski @lgerlinski |

Viber ━━━━━━━━ 
Yuri Chukhlib @YuriNachos |
🎓 By Education
|
Assumption University of Thailand ━━━━━━━━ 
Panuphong Burakitphachai @t1dotdev |
Linnaeus University ━━━━━━━━ 
Balazs Hevesi @balazshevesi |
NTU Singapore ━━━━━━━━ 
Nawat Suangburanakul @holmns |
SUSTech ━━━━━━━━ 
Yang-Yiming @Yang-Yiming |
✨ All Contributors


|


- Real quake/sticky terminal using ghostty's libghostty
- macOS native tab support
- IPC/CLI
- Scratchpads/sticky windows for any app
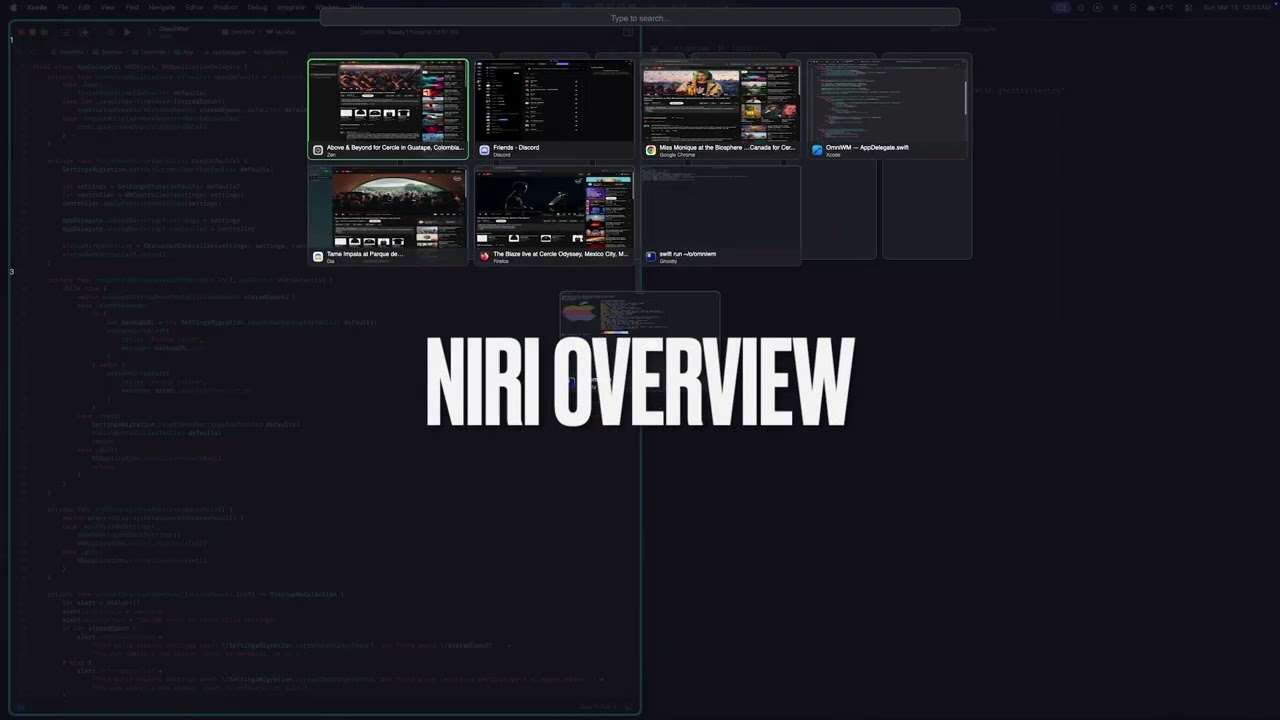
- Niri Overview
- Unified command palette for windows and app menus
- App menu anywhere
- Niri tabbed columns and Dwindle tile groups
- Niri and Dwindle layout
- Hide/unhide status bar icons (Similar to Ice Bar)
- Keep awake (Similar to Caffeine)
- Interactive workspace/app icon bar
- Many more features not shown in the video.
Known Limitations
- Dwindle group restore - Group membership and tab order are runtime layout state and are not restored after OmniWM restarts.
Performance & Trust
OmniWM is built for high responsiveness and smooth, crisp animations.
- Private APIs - OmniWM leverages Apple's private APIs wherever technically possible in order to reduce latency and improve window management responsiveness.
- Refresh rate aware animations - OmniWM targets true display refresh pacing (for example 60/120/144Hz) for animations.
- No SIP disable required - OmniWM does not require System Integrity Protection (SIP) to be disabled and never will.
- Always notarized official releases - Official OmniWM release builds are developer signed and notarized by Apple and will stay that way.
- Forever free, no limitations - OmniWM is and will remain free to use forever, with no subscriptions, feature paywalls, trial limits, or usage caps.
Requirements
- macOS 26+ (Tahoe) on Apple Silicon
- Accessibility and Input Monitoring permissions (required at launch)
- Screen Recording permission for Overview thumbnails, drag previews, and captured Hidden Bar glyphs (optional)
- Displays have separate spaces ON (the macOS default; OmniWM pauses window management until it is enabled)
Installation
Homebrew
brew tap BarutSRB/tap
brew install omniwm
Nix
OmniWM supports both community-maintained Nix packages below, alongside a real-world Home Manager configuration example. The packages install official OmniWM release artifacts, while their Nix expressions are maintained by DoomHammer and DavSanchez respectively.
| Package or example | Best for | Packaging or configuration difference |
|---|---|---|
| DoomHammer NUR package | Fast release tracking | Its current unzip extraction does not preserve the release's valid Developer ID signature, and it installs the app bundle without exposing omniwmctl on PATH. |
| DavSanchez package and Home Manager module | Signature-preserving, declarative integration | It may trail the latest release, but its bsdtar extraction preserves code signing and it provides omniwmctl, Home Manager settings, and launchd integration. |
| ryoppippi Home Manager configuration | Real-world declarative setup example | It builds on DavSanchez's module, enables launchd, and merges a tracked settings template while preserving GUI-managed, machine-specific monitor settings. |
Install the fast-tracking DoomHammer package directly:
nix profile install github:DoomHammer/nur-packages#omniwm
Existing NUR configurations can use nur.repos.doomhammer.omniwm.
Install the signature-preserving DavSanchez package directly:
nix profile install github:DavSanchez/nix-dotfiles#omniwm
For a declarative setup, use DavSanchez's exported
homeModules.omniwm
and overlays.additions. After either installation, complete the macOS setup in steps 3-6 below.
GitHub Releases
- Download the latest
OmniWM-v<version>.zipapp archive from Releases - Extract and move
OmniWM.appto/Applications - In System Settings > Desktop & Dock > Mission Control, turn ON
Displays have separate Spaces - Log out of macOS and log back in for that change to take effect unless you had it on already
- Launch OmniWM and grant Accessibility and Input Monitoring when prompted
- Optionally grant Screen Recording for capture-derived visuals
Updates
OmniWM checks for updates by default.
- On launch, OmniWM polls the latest GitHub release at most once per day.
- Updates stay manual. OmniWM does not auto-download or auto-install a new release.
- When a newer release is available, OmniWM shows a centered popup with release notes and actions for
Open Release Page,Copy brew upgrade omniwm,Skip This Version, andNot Now. - You can control this from
Settings > General > Updatesor trigger a manual check from the status bar menu withCheck for Updates....
Documentation
The documentation hub lives in docs/index.md.
- Documentation Home
- Architecture Guide
- IPC & CLI Reference
- Contribution Docs
- Canonical Contributing Guide
IPC and CLI
OmniWM ships with a bundled CLI, omniwmctl, for automation and scripting.
IPC is disabled by default. Enable Enable IPC from the menu bar before using the CLI or any automation.
Diagnostics can be scripted with omniwmctl capture start trace, omniwmctl capture start performance, omniwmctl capture stop, and omniwmctl capture status.
For setup, installation options, commands, queries, rules, subscriptions, and security details, see docs/IPC-CLI.md.
Quick Start
- Launch OmniWM from your Applications folder
- In System Settings > Desktop & Dock > Mission Control, turn ON
Displays have separate Spaces - Log out of macOS and log back in for that change to take effect unless you had it on already
- Grant Accessibility and Input Monitoring in the launch permissions window
- Windows will automatically tile in orientation-aware Niri containers: monitors using horizontal orientation show columns that scroll left and right, while vertical orientation shows rows that scroll up and down
- Keep one macOS Space per display and navigate with OmniWM workspaces; extra native Spaces are tolerated (their windows are left to macOS, not tiled)
- Use the defaults in Keyboard Shortcuts to navigate, and customize them in
Settings > Hotkeys - Click the menu bar icon to access Settings, including
Settings > General > Updates - Enable
Start at LoginunderSettings > General > Startupto launch OmniWM automatically when you log in - Use
Check for Updates...from the status bar menu whenever you want to run a manual update check - On macOS 27+, if you enable Hidden Bar and selected menu-bar icons disappear, right-click or Option-click OmniWM's menu-bar icon to open the Hidden Icons Bar and click any icon to use it.
User Guide
Multi-Monitor Setup
OmniWM uses two display maps for different jobs:
- Open System Settings > Displays > Arrange. Put the physically largest or widest display at the bottom. Place the next smaller display above and to its right so its bottom-left corner touches the lower display's top-right corner. Continue the same staircase for every additional display. This macOS map is a technical arrangement used for actual window placement; it does not need to look like your desk.
- Open OmniWM Settings > Monitors and arrange the OmniWM routing map to match where the displays really sit on your desk. Tiles can be separated by empty grid cells, but every display must remain connected through a chain of shared rows or columns. A diagonal-only tile is disconnected and cannot exchange directional focus, window moves, or mouse warp.
- Assign at least one workspace to every connected display. Window moves between displays need a destination workspace, so the setup assistant will not finish while a display is uncovered. You can reassign an existing workspace or explicitly add one for that display.
- Leave Mouse Warp turned on for the recommended experience. It lets the pointer cross between displays according to the real-desk OmniWM map even though macOS uses the staircase.
The setup assistant opens automatically when OmniWM first sees multiple displays. To review or redo it later, choose Run Monitor Setup… in Settings > Monitors. The assistant's Show Numbers on Screens action helps match each physical display to its tile. Routing, workspace-home, and Mouse Warp changes remain drafts until you finish the assistant.
Layout Modes
OmniWM offers two layout engines that you can switch between per workspace:
Niri (Orientation-Aware Scrolling Containers) - On monitors using horizontal orientation, windows form vertical columns that scroll left and right; in vertical orientation, they form horizontal rows that scroll up and down. Each container can hold multiple windows or be "tabbed" (multiple windows, one visible at a time).
Hyprland Dwindle (BSP) - Binary space partition layout that recursively divides screen space. Each new window splits the space in half, and a tile can group multiple windows as tabs. Best for traditional tiling with predictable layouts.
Use the Toggle Workspace Layout shortcut below to switch layouts per workspace or configure them in GUI settings.
Keyboard Shortcuts
All shortcuts are customizable in Settings > Hotkeys. Hyper is the literal Control + Option + Shift + Command chord by default; which modifiers make up Hyper is configurable in Settings > Hotkeys (for example, exclude Shift to keep Hyper + Shift + … free for extra bindings). Changing the combination retargets every shortcut that currently resolves to Hyper onto the new one, so the shortcut list updates in place as you toggle the modifiers. Optionally pick a System Hyper Trigger — a single key (Caps Lock, F13–F20, or a left- or right-side modifier) or an extra mouse button that acts as Hyper while held (this needs Input Monitoring permission). Leave the trigger as None if you already produce Hyper another way, such as a Karabiner Elements remap. The tables below list all the default hotkeys:
Layout legend:
Sharedworks in any active layout.Niriworks only when the active workspace uses the Niri layout.Dwindleworks only when the active workspace uses the Dwindle layout.
Settings hides advanced actions from the shortcut list by default. Turn on Include Advanced Commands in Settings > Hotkeys to see and bind them; the tables below include both standard and advanced actions.
Workspace
| Action | Default Shortcut | Layout |
|---|---|---|
| Switch to Workspace 1-9 | Option + 1-9 |
Shared |
| Move Window to Workspace 1-9 | Option + Shift + 1-9 |
Shared |
| Switch to Last Active Workspace (Back and Forth) | Control + Option + Tab |
Shared |
| Switch to Next Workspace | Unassigned |
Shared |
| Switch to Previous Workspace (Sequential) | Unassigned |
Shared |
| Move Window to Workspace Up | Control + Option + Shift + Up Arrow |
Shared |
| Move Window to Workspace Down | Control + Option + Shift + Down Arrow |
Shared |
| Move Column to Workspace 1-9 | Unassigned |
Niri |
| Move Column to Workspace Up | Control + Option + Shift + Page Up |
Niri |
| Move Column to Workspace Down | Control + Option + Shift + Page Down |
Niri |
Focus
| Action | Default Shortcut | Layout |
|---|---|---|
| Focus Left / Right / Up / Down | Option + Arrow Keys |
Shared |
| Focus Down or Top / Up or Bottom | Unassigned |
Shared |
| Focus Top Window / Bottom Window | Unassigned |
Niri |
| Focus Window or Workspace Down / Up | Unassigned |
Niri |
| Focus Previous Window | Option + Tab |
Shared |
| Traverse Backward | Unassigned |
Niri |
| Traverse Forward | Unassigned |
Niri |
| Focus First Column | Option + Home |
Niri |
| Focus Last Column | Option + End |
Niri |
| Focus Column 1-9 | Control + Option + 1-9 |
Niri |
| Focus Window 1-9 in Column | Unassigned |
Niri |
| Toggle Command Palette | Control + Option + Space |
Shared |
| Open Menu Anywhere | Control + Option + M |
Shared |
| Toggle Workspace Bar | Unassigned |
Shared |
| Toggle Hidden Icons Bar | Unassigned |
Shared |
| Toggle Quake Terminal | Option + ` |
Shared |
| Toggle Overview | Option + Shift + O |
Shared |
| Toggle System Stats | Unassigned |
Shared |
Move Window
| Action | Default Shortcut | Layout |
|---|---|---|
| Move Left / Right / Up / Down | Option + Shift + Arrow Keys |
Shared |
| Reorder Window Up / Down | Unassigned |
Shared |
| Move Window Down or to Workspace Down / Up or to Workspace Up | Unassigned |
Niri |
| Consume Window into Column / Expel Window from Column | Unassigned |
Niri |
Monitor
| Action | Default Shortcut | Layout |
|---|---|---|
| Focus Next Monitor | Control + Command + Tab |
Shared |
| Focus Previous Monitor | Unassigned |
Shared |
| Focus Last Monitor | Control + Command + ` |
Shared |
| Move Workspace to Left / Right / Up / Down Monitor | Unassigned |
Shared |
| Move Window to Left / Right / Up / Down Monitor | Unassigned |
Shared |
The workspace-to-monitor actions target the active workspace and intentionally use the same temporary runtime override as omniwmctl workspace move-to-monitor --force. They do not rewrite the workspace's Home Monitor or swap workspaces, and unsafe fullscreen, hidden-app, scratchpad, or focus states still block the move.
The window-to-monitor actions send the focused window directly to the current workspace on the adjacent routed display, independently of Move Window Across Monitor at Edge. The destination display must have at least one assigned workspace, which the Monitor Setup assistant verifies. They do not wrap when no monitor exists in that direction. Follow Window to Monitor controls whether focus follows the window; when it is off, you remain in the source workspace.
Layout
| Action | Default Shortcut | Layout |
|---|---|---|
| Toggle Fullscreen | Option + Return |
Shared |
| Toggle Native Fullscreen | Unassigned |
Shared |
| Balance Sizes | Option + Shift + B |
Shared |
| Cycle Size Forward | Option + . |
Shared |
| Cycle Size Backward | Option + , |
Shared |
| Move to Root | Unassigned |
Dwindle |
| Toggle Split | Unassigned |
Dwindle |
| Swap Split | Unassigned |
Dwindle |
| Grow Horizontally / Vertically | Unassigned |
Dwindle |
| Shrink Horizontally / Vertically | Unassigned |
Dwindle |
| Grow / Shrink Focused Window | Unassigned |
Dwindle |
| Preselect Left / Right / Up / Down | Unassigned |
Dwindle |
| Clear Preselection | Unassigned |
Dwindle |
| Raise All Floating Windows | Option + Shift + R |
Shared |
| Rescue Off-Screen Floating Windows | Unassigned |
Shared |
| Toggle Focused Window Floating | Unassigned |
Shared |
| Assign Focused Window to Scratchpad 1-10 | Unassigned |
Shared |
| Toggle Scratchpad 1-10 | Unassigned |
Shared |
| Toggle Workspace Layout | Option + Shift + L |
Shared |
Container and Column
| Action | Default Shortcut | Layout |
|---|---|---|
| Move Container Left / Right | Control + Option + Shift + Left / Right Arrow |
Shared |
| Move Container Up / Down | Unassigned |
Dwindle |
| Toggle Column Tabbed | Option + T |
Niri |
| Toggle Container Full Primary Span | Option + Shift + F |
Niri |
| Expand Container to Available Primary Span | Control + Option + F |
Niri |
| Move Column to First / Last | Control + Option + Home / End |
Niri |
| Move Column to Index 1-9 | Unassigned |
Niri |
| Set Container Primary Span -10% / +10% | Option + - / Option + = |
Niri |
| Set Window Secondary Span -10% / +10% | Option + Shift + - / Option + Shift + = |
Niri |
| Set Window Primary Span -10% / +10% | Unassigned |
Niri |
| Reset Window Secondary Span | Control + Option + R |
Niri |
| Cycle Window Primary Span Forward / Backward | Unassigned |
Niri |
| Cycle Window Secondary Span Forward / Backward | Unassigned |
Niri |
| Center Column | Unassigned |
Niri |
| Center Visible Columns | Unassigned |
Niri |
Consume or Expel Window Left / Right exist as automation-only actions. They are reachable from omniwmctl but never appear in Settings > Hotkeys, because they intentionally cannot be bound to a shortcut.
The daily Focus and Move shortcuts adapt to the active layout and Niri orientation. In horizontal Niri orientation, Move Left / Right consumes or expels across columns while Move Up / Down reorders within a column. Vertical orientation rotates those roles: Move Up / Down consumes or expels across rows while Move Left / Right reorders within a row.
Dwindle Groups
Dwindle groups use the existing Focus and Move bindings, so there are no separate group shortcuts to memorize. Only the active member occupies the tile; the other members stay hidden and the clickable tab rail shows their order.
| Goal | Default Shortcut | Behavior |
|---|---|---|
| Focus another tile | Option + Arrow Keys |
Left / Right are always spatial. Up / Down are spatial for a singleton tile. |
| Select the next / previous tab | Option + Down / Up Arrow |
Within a group, Down advances and Up goes back. At the group edge OmniWM tries a spatial tile, then the configured monitor transition, and wraps locally only when neither exit succeeds. |
| Join a singleton into a tile or group | Option + Shift + Arrow Keys |
Joins the focused singleton with the touching tile in that direction. |
| Extract the active tab | Option + Shift + Arrow Keys |
When the focused tile is grouped, extracts only its active tab onto the requested side. |
| Move the complete tile or group | Control + Option + Shift + Left / Right Arrow |
Move Container swaps the whole structure. Up / Down are advanced, unassigned Dwindle actions. |
| Select an exact tab | Click its tab rail item | Reveals and focuses that member without changing the group order. |
Moving a tab directly from one existing group into another is intentionally a two-step operation: extract it first, then move the resulting singleton toward the destination group. A singleton at a genuine workspace edge can still use the normal cross-monitor Move behavior; a rejected group mutation does not fall through to tile swapping or monitor movement.
The unassigned advanced actions are available in Settings > Hotkeys. Focus Down or Top / Up or Bottom always wraps within the active Niri column or Dwindle group. Reorder Window Up / Down changes the active member's position by one without wrapping. Move Container is the whole-structure escape hatch and never transfers to another monitor at a workspace edge. Dwindle join/extract and Move Container operations are intentionally unavailable while Overview is open; leave Overview before changing a Dwindle tree.
Quake Terminal (Inside Terminal)
| Action | Shortcut |
|---|---|
| New Tab | Cmd + T |
| Close Tab | Cmd + W |
| Next Tab | Cmd + Shift + ] |
| Previous Tab | Cmd + Shift + [ |
| Next Tab (Alt) | Ctrl + Tab |
| Previous Tab (Alt) | Ctrl + Shift + Tab |
| Select Tab 1-9 | Cmd + 1-9 |
| Split Pane (Horizontal) | Cmd + D |
| Split Pane (Vertical) | Cmd + Shift + D |
| Close Pane | Cmd + Shift + W |
| Equalize Splits | Cmd + Shift + = |
| Navigate Pane | Cmd + Option + Arrow Keys |
Features
Quake Terminal
A true quake/sticky terminal (powered by Ghostty's libghostty) that slides in from the screen edge and:
- Toggle it from the global shortcut shown in
Keyboard Shortcuts - Supports multiple tabs and splits within tabs
- Tab and pane shortcuts are listed in Quake Terminal (Inside Terminal)
- Mouse resize by dragging edges;
Option + dragto move (remembers size/position per monitor) - Configure position (top/bottom/left/right/center), size, opacity, and background effect in Settings
- Choose Standard Blur with an adjustable radius or native Regular Glass/Clear Glass; switching effects preserves the saved Standard Blur radius
- Auto-hides on focus loss (optional)
Command Palette
Quickly search windows, app menus, or clipboard history from one shared palette:
- Open it from the global shortcut shown in
Keyboard Shortcuts - Use
Tab/Shift + Tabto cycle forward or backward through the available modes - Use
Cmd + 1forWindows,Cmd + 2forMenu, andCmd + 3forClipboard - Type to fuzzy-search by window title, app name, menu item, or clipboard content
- Menu results always show keyboard shortcuts when available
Up/Downmove the selectionEnteractivates the selected result- Windows from macOS-hidden apps remain searchable with a Hidden badge; selecting one unhides its app and focuses that exact window
Shift + Entersummons the selected window to the right when availableEscapedismisses the palette
Menu Anywhere
Access any application's menu from your keyboard:
- Shows the native menu at the cursor from a global shortcut
Overview Mode
See all windows at once with thumbnails:
- Open it from the global shortcut shown in
Keyboard Shortcuts - Configure the 50–150% baseline zoom plus backdrop and window-border colors in Settings → Overview
- Click a window to focus it
- Type to filter/search windows;
Backspacedeletes search text Alt (Option) + Shift + Mouse Scrolltemporarily zooms the current overview; the next opening starts from the configured baselineArrow Keysnavigate spatially;Left/Rightstay within the current workspace.Tab/Shift + Tabcycle forward or backward through matching windows, and keyboard navigation automatically scrolls the selected thumbnail into view- Assigned structural move, reorder, consume/expel, and workspace-transfer shortcuts operate on the selected thumbnail while Overview is open
- In Niri workspaces, reorder windows and columns, consume or expel windows, move windows into or out of columns, move windows across workspaces and monitors, and move whole columns between Niri workspaces
- Adjacent-workspace fallback actions can create the next compatible unused numeric workspace when moving past the current workspace edge
- In Dwindle workspaces, Overview supports moving windows across workspaces and closing them without adding Overview-only tree placement controls
- A successful move keeps the moved window selected and activates its destination workspace and monitor behind Overview
Option + draga thumbnail onto a workspace, an exact window position, or a Niri column gap; layouts without an exact placement equivalent fall back to moving it to the destination workspaceCommand + Wcloses the selected window once per press and keeps Overview open; selection advances only after the window has closedEnter,Escape, the configured Overview shortcut, and clicking the backdrop dismiss Overview and focus the current selection;Escapedoes not clear search first- If another application takes focus, Overview dismisses without stealing focus back
Workspace Bar
A visual indicator showing your workspaces:
- Displays open apps per workspace
- Click to switch workspaces or jump to that app
- When
Deduplicate App Iconsis enabled, multiple windows from one app share an icon; click a grouped icon to open their window list, while a single-window icon focuses that window directly - Marks macOS-hidden windows with an eye-slash badge; selecting a hidden window unhides its app and focuses that exact window
- Configure position, height, and appearance in Settings
- Optionally show a System Stats button that opens a CPU, memory, GPU, disk, and uptime popup.
Toggle System Statsandomniwmctl command toggle-system-statsdrive the same popup, and both do nothing unless a monitor currently shows that workspace-bar button - Optionally hide the bar on a monitor while that monitor shows a macOS native fullscreen window, and bring it back on exit (
Hide in Native Fullscreen); reserved tiled layout space is left untouched so windows do not shuffle around the fullscreen session - Exclude individual apps or choose alternate app icons across all monitors in Settings
Workspace-bar icon overrides can also be configured in settings.toml. Quote bundle IDs so TOML treats each dotted identifier as one key:
[workspaceBar.iconOverrides]
"com.example.App" = "icons/custom.icns"
"com.cmuxterm.app" = "bundle-resource:AppIconDark"
bundle-resource: loads a named image packaged inside the selected app. The Settings picker discovers likely app-icon resources on demand; runtime-generated or downloaded Dock icons may not be available. Absolute paths are used as written, ~ expands to your home directory, and relative paths are resolved from the directory containing settings.toml. Overrides affect only the workspace bar. A valid override takes precedence over the app's standard icon; an unavailable or invalid image falls back to the standard icon, then the dashed placeholder when no app icon is available. OmniWM does not watch image files; use Replace to reload a file changed in place.
Hidden Bar
Conceal selected menu-bar icons and reach them from a panel:
- Concealment requires macOS 27 or later; the rest of OmniWM continues to support macOS 26
- Pick the apps to hide in
Settings > Hidden Bar - Right-click (or Option-click) the OmniWM menu bar icon to open the Hidden Icons Bar; click an icon to reveal and use it
- Revealed icons re-hide automatically after a configurable interval
- An optional global hotkey is available and starts unassigned
Tips
- Workspaces - Create named workspaces in Settings to organize by project or context (You can use emojis 🥳)
- App Rules - Exclude problematic apps from tiling or assign them to specific workspaces
- Mouse - On the Niri desktop, hold the configured mouse-move modifier and drag to swap tiled windows; add
Shiftto insert into a column. The modifier defaults toOptionand can be changed or disabled in Settings → Mouse & Trackpad. In Overview,Option + dragtargets a workspace, window position, or Niri column gap - Mouse Resize - Hold the configured right-mouse resize modifier (
Optionby default) and right-drag a tiled window to resize it in either layout - Scroll Gestures (Mouse) - Hold
Option + Shift + Mouse Scroll Wheel(default, configurable) to scroll along the active Niri primary axis: left/right in horizontal orientation or up/down in vertical orientation - Trackpad Gestures - Use 2/3/4-finger gestures (configurable) along the active Niri primary axis; direction can be inverted (local hardware validation is limited)
- Workspace Swipe (Trackpad) - Opt-in in Settings → Mouse & Trackpad: swipe with a configurable finger count (2/3/4) and axis (horizontal/vertical) to switch to the next/previous workspace on the monitor under the cursor, one switch per swipe; sharing the column-scroll finger count locks the axis to vertical. For vertical swipes with three or four fingers, first turn off Mission Control in → System Settings → Trackpad → More Gestures so macOS does not intercept the gesture.
Configuration
Access settings by clicking OmniWM's status bar icon and selecting Settings or App Rules. Mouse and gesture settings live in Settings under Mouse & Trackpad.
Settings > General also carries a System-wide Window Corners control (macOS 26.4+). It writes the system-wide preference, so it changes standard Mac app windows everywhere — including windows OmniWM does not manage — and apps that draw their own window chrome may ignore it. Affected apps must be fully quit and reopened before the new radius applies.
OmniWM stores its editable config at ${XDG_CONFIG_HOME:-$HOME/.config}/omniwm/settings.toml; that file is the canonical settings source and is live-reloaded when saved from an editor.
- Reveal Settings File and Edit Settings File open the canonical TOML file and recreate it from the running settings if it was deleted.
updateChecksEnabledis part of the persisted settings model, so it round-trips throughsettings.toml.- Clipboard history, last-check timestamps, skipped-release state, and the persisted window restore catalog live in
${XDG_STATE_HOME:-$HOME/.local/state}/omniwmand stay out of dotfile-oriented config storage.
Scratchpads
A scratchpad is a slot that holds any number of floating windows and overlays them on the workspace you are looking at. There are ten slots, numbered 1 to 10; a slot with no windows in it is inert and invisible.
- Assign Focused Window to Scratchpad N moves the focused window into slot N, floating it if it was tiled and parking it off-screen. Pressing the same shortcut again on a window already in slot N returns it to the layout.
- Toggle Scratchpad N reveals every window in slot N on the monitor you are interacting with, or parks them again if they are already there. Revealing a slot parks whichever slot was showing, so at most one scratchpad is on screen at a time.
- A revealed scratchpad follows you across workspace switches and stays up until you toggle it off. If it is showing on another monitor, its shortcut summons it to the one you are on.
- Revealed windows are ordinary floating windows: whether clicking something underneath pushes them behind it is governed by the usual focus and raise behaviour, including Raise Window When Focus Follows Mouse.
Each non-empty slot gets a pill in the workspace bar showing its name and its windows' icons; clicking
the pill toggles that scratchpad. Slots are identified by number everywhere, and an optional label
replaces the number in the workspace bar and in omniwmctl output:
[scratchpads.labels]
1 = "term"
3 = "COMMS"
Scratchpad membership lasts for the lifetime of the OmniWM process; only the labels are persisted.
App Rules
Open App Rules from OmniWM's status-bar menu to configure window-matching behavior. Rules can match by bundle ID, app-name substring, title substring or regex, and AX role/subrole. More-specific matches win; ties follow list order.
- Layout (Automatic / Tile / Float) - Leave classification automatic, or force matching windows to tile or float
- Assign to Workspace - Use a valid workspace assignment as the initial default whenever the matching app currently has no tracked windows. Additional windows open on the workspace active when creation began. Automatic rule reevaluation leaves managed windows in place, while explicit rule application can move them. Readmission, structural replacements, and unique persisted boot-restore matches preserve their existing placement continuity.
- Initial Container Primary Span (Niri) - Start matching resizable windows at 5–100% when they create or claim a new container; the container remains freely resizable afterward
- Minimum Size - Prevent the layout engine from sizing windows below a threshold
Structural admission runs before ordinary rule ranking. Help tags, input-method surfaces, and WindowServer
children of another window stay unmanaged. At ordinary WindowServer levels, a closeable, parentless
accessory-app AXWindow is eligible for normal classification. Buttonless accessory roots, prohibited-app
roots, non-AXWindow roles, and otherwise unsupported AX subroles require an identifying rule with exact
axRole and axSubrole values plus a Tile or Float layout. Parentless roots at status-window level or higher
use the same precise shape, but only a user rule can opt them in; built-in rules cannot. A broad bundle/title
rule or Automatic layout does not cross these gates.
Initial container primary span is a one-time seed. It controls width in horizontal orientation and height in vertical orientation. Niri's Single Window Fit still takes visual precedence for a lone window, and physical minimum-size constraints can clamp the resolved pixel size without changing the stored initial proportion.
The equivalent TOML rule uses a proportion:
[[appRules]]
bundleId = "net.kovidgoyal.kitty"
initialContainerPrimarySpan = 0.5
Building from Source
Requirements:
- SwiftPM with Swift 6.4+
- macOS 26.0+
- A complete GhosttyKit xcframework at
Frameworks/GhosttyKit.xcframework. Download the latestGhosttyKit.xcframework-v<version>.zipasset from Releases and extract it intoFrameworks/, or replace the complete bundle with one you build from Ghostty. - The build preflight verifies the internal arm64 archive at the path pinned in
Scripts/build-metadata.env(currentlyFrameworks/GhosttyKit.xcframework/macos-arm64/libghostty-internal.a) is arm64-only and matches the pinned SHA-256. If you rebuild GhosttyKit, replace the complete xcframework and update the metadata pin.
Use the bundled Debug launch for day-to-day development:
make run
make run builds, packages, development-signs, and opens dist/OmniWM.app through LaunchServices. This is the canonical development launch because it gives OmniWM its normal app identity. OmniWM uses its native status bar item while Hidden Bar concealment is inactive. While concealment is active, it uses a separate fallback icon beside a visible workspace bar, or near the display's top center when no workspace bar is visible, because macOS can conceal the app-owned status item with the other restricted items. This behavior applies to both bundled and raw swift run OmniWM launches and is not specific to Debug builds.
Community Integrations
- OmniWM Computer Use is a community-maintained Codex skill for focus-safe Computer Use, browser automation, and app testing through
omniwmctlacross OmniWM workspaces and displays. - OmniCast is a community-maintained Raycast extension for controlling OmniWM with plain-English search and commands through
omniwmctl.
Related Forks
- Nehir is an endorsed OmniWM fork focused on a narrower, more opinionated Niri-style scrolling-column workflow. It may be friendlier for beginners who want guided defaults and a smaller feature surface, while OmniWM remains the broader upstream project with multiple layout modes and the full feature set.
- choru-k/OmniWM is an interesting personal OmniWM fork experimenting with opt-in workflow layers on top of upstream OmniWM, including zone anchors for the Niri strip, a configurable F13-F20 leader-key chord menu, tabbed-column keyboard cycling, and trackpad-friendly modifier resizing. It is best read as a power-user workflow branch rather than a replacement for the main OmniWM release.
Support
If you find OmniWM useful, consider supporting development:
Reporting Bugs
The best way to report a bug is from inside OmniWM: open the status-bar menu and choose Report a Bug…. That opens the in-app report form, where recording or attaching trace and crash evidence is optional. On submit, OmniWM prepares one fresh diagnostic .log (with any evidence you selected appended), reveals it in Finder for you to attach, and opens a pre-filled GitHub issue — OmniWM never sees your GitHub login. Review the .log before attaching it to a public issue: it can include settings, app and window titles, and title-based rule matchers.
Prefer the web? The GitHub issue form works too; please include your OmniWM and macOS versions there.
Contributing
Issues and pull requests are welcome on GitHub.
Start with CONTRIBUTING.md for the actual project guidelines, expectations, and preferred direction.
For deeper technical context, the docs pages that back the documentation site are here:
License
OmniWM is licensed under the GNU General Public License v2.0-only. Copyright (C) 2026 BarutSRB — https://github.com/BarutSRB/OmniWM.
Every source file carries an SPDX license header. Forks and redistributions must retain these notices and the LICENSE file, and remain GPL-2.0 with source available.